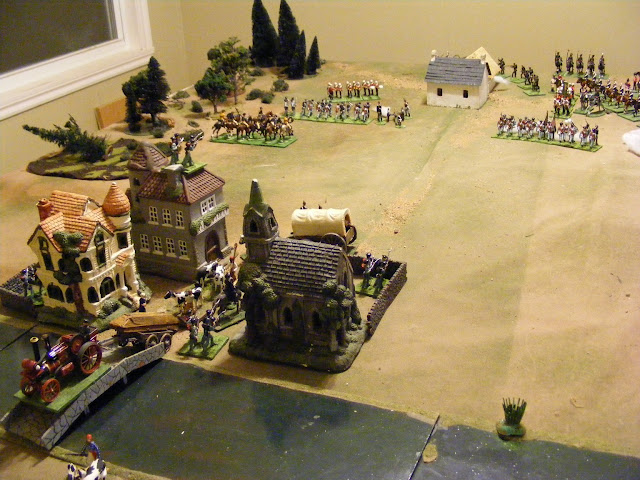
This game was played solo using 40mm 19thC fictional armies and Hearts of Tin rules.
I wanted to play this on my 6'x8' table but life interfered so I squeezed it onto my temporary 5'x6' table.
The battle began well enough for Blue, the 1st infantry coolly forming square to repulse a cavalry attack then deploying into line unleashing some deadly volleys into the Buffs. As Red continued to build up their forces, they could make no headway, even their rockets doing more damage to friends than the enemy.
Behind the lines, the evacuation began smoothly and the engineers began work on a redoubt but as the new steam tractor puffed over the bridge, it hit a rut and threatened to roll over. Four turns passed before the bridge could be cleared. By this time the pressure was building on Blue's front line and it started to withdraw but too late! The rocket battery finally found the range just as the Queen's Rifles cleared the village and opened up on the 1st Infantry. As they staggered from the sudden heavy casualties the Bodyguard charged in and the line broke. Pursuing through, the Bodyguard crashed into the newly raised Frontier Horse but wielding their rifles from the saddle these fought them to a stand still. There was no room for these bold horsemen to retreat to so a swirling melee ended in their annihilation as a fighting unit. Covered by the Frontier Horse, the remnants of Blue's advance guard pulled back closely pursued by Red's infantry.
The engineers in town finished a fine redoubt then belatedly remembered their main purpose. As the light faded, the last wagons cleared the bridge followed by a handful of stragglers, a few light infantry, 1/2 a battery and a couple of battered companies of infantry as the remnants of the 3rd Infantry rallied in the streets and prepared to try and hold back one more charge to give them time to get away. Behind them, the engineers cleared the bridge and lit the fuse. A massive explosion threw up clouds of dust and shook the bridge but when it all settled, the bridge still stood.
In late 2008, in an effort to get myself playing more games, I decided to play all 52 scenarios from Scenarios For All Ages by
Charles S Grant and Stuart Asquith. More than that, I decided to play them in order, 1 a week, starting on Nov 5. I knew I wouldn't
manage to play every week so I set a deadline of Dec 31st 2009. With a little help from my friends, I made it with a day to spare.
In the end, I played 52 games in 60 weeks. 34 solo games, 15 face to face games, 3 Play-by-Email mini-campaigns
17 other gamers from 4 countries participated, (Canada 11, US 4, Ireland 1, Argentina 1)
11 'periods' were played - 20/25mm Ancients (3), Prince Valiant 40mm skirmish (9), 40mm 16thC (10),
40mm semi-flat War of Polish Sucession (1), 40mm AWI (2), 40mm Pirate
Skirmish (5), 40mm early 19thC fictional (17), 15mm ACW (1), 25mm Zulu War (1),
20mm WWII (1), 20mm 1960's fictional (2)
I posted a brief report on each game on my webpage. I am shutting down my website so I am re-posting
the reports here, starting at Game #52 so that they will eventually appear in order. The reports were written in a variety of voices and tenses (sometimes all mixed together!) and it was tempting to rewrite them but I have left them as they were originally written with only very minor corrections, particularly to things like links.
To avoid copyright issues and save myself work, I have not given the details of the scenarios. Having a copy of the book will help make sense of the reports. The book may currently be purchased from John Curry at http://www.wargaming.co/ as well as from booksellers like On Military Matters and Caliver.
My Other Blogs
Subscribe to:
Post Comments (Atom)

No comments:
Post a Comment
Note: Only a member of this blog may post a comment.